

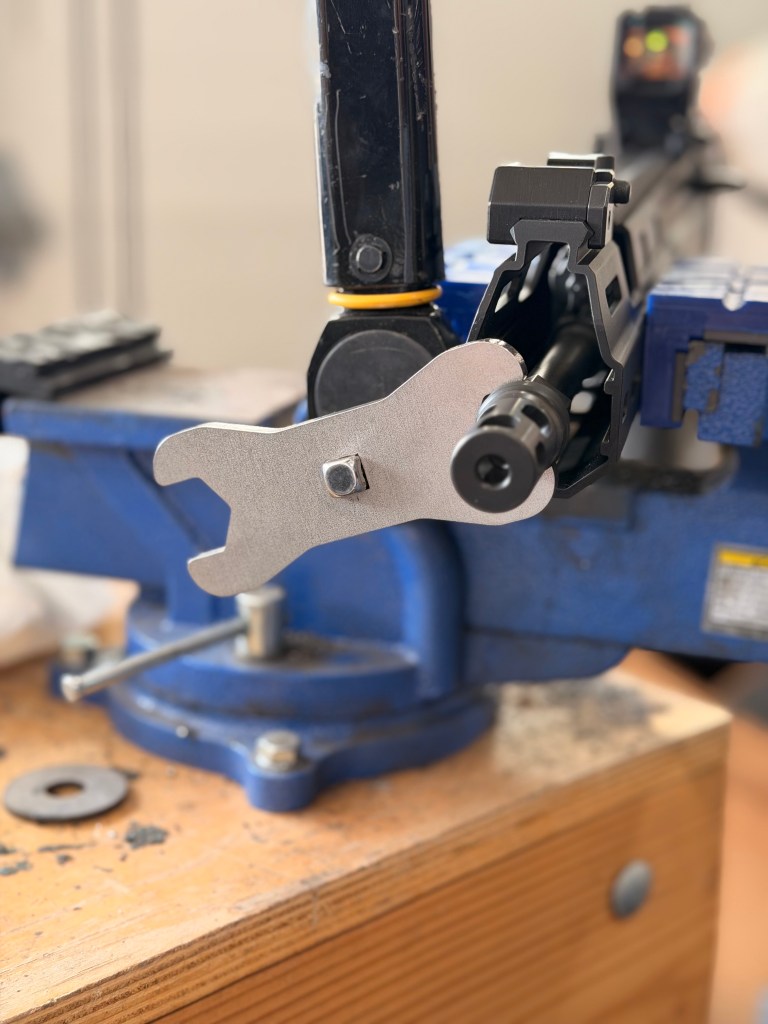
Installing a Plan B style muzzle device (Q, Rearden, Comstock Armory, etc.) correctly is critical for both firearm performance and safety—especially if you plan to run a suppressor. Improper installation can lead to baffle strikes, accuracy degradation, or the device “walking off” the barrel.
Below is a step-by-step guide to achieving a professional-grade installation using high-strength tools and Rocksett.
Essential Tools & Materials
Before you begin, ensure you have the following on your bench:
- Torque Wrench: Capable of measuring in the 20–35 ft-lbs range.
- Muzzle Device Tool: Specifically the Concentric Tool Co. CT-1 or CT-2 (or a high-quality 3-lug/armorer’s tool) to ensure a secure fit without marring the finish (Blackout Dynamics, n.d.).
- Vise & Action Block: To secure the upper receiver or barrel without causing damage (Precision Armament, n.d.).
- Degreaser: Acetone or high-strength isopropyl alcohol.
- Rocksett: A high-temperature thread locker
- Shim Kit: For proper timing/indexing (do not use crush washers for suppressor mounts).
Step 1: Preparation & Degreasing
For Rocksett to bond correctly, the surfaces must be chemically clean.
- Clean the Threads: Use acetone and a lint-free cloth to thoroughly degrease the barrel threads and the internal threads of the muzzle device.
- Remove Contaminants: Ensure all oil, grease, and carbon are gone. Even a small amount of residual oil can prevent Rocksett from curing properly.
Step 2: Dry Fit & Timing
“Timing” refers to indexing the muzzle device so its ports are oriented correctly (usually 12 o’clock or 3/9 o’clock depending on the model).
- Test Alignment: Thread the device on hand-tight. If the ports aren’t aligned, use a shim kit to adjust the spacing.
- The Shim Rule: Use the thinnest shims necessary. Avoid “stacking” too many shims, which can introduce alignment issues.
Step 3: Applying Rocksett
Unlike standard Loctite, Rocksett is incredibly heat-resistant, making it the industry standard for muzzle devices.
- Application: Apply one or two drops to the barrel threads. Distribute it evenly around the circumference.
- Caution: Do not over-apply. Excess Rocksett can seep into the bore or interfere with the suppressor mounting interface.
Step 4: Torquing to Spec
This is where precision matters most to avoid “bore constriction” or accuracy loss.
- The Setup: Fit your CT-1 or CT-2 tool to the muzzle device and attach your torque wrench.
- Apply Force: Smoothly torque the device to the manufacturer’s recommended spec—typically 25–35 ft-lbs.
Step 5: Curing & Final Check
- Wipe Excess: Use a damp cloth to clean any Rocksett that squeezed out of the threads.
- Cure Time: Allow the Rocksett to cure for at least 24 hours before firing.
- Safety Check: If using a suppressor, always verify alignment with a bore rod before your first shot.